
DIY Smart Family Calendar Screen for Under $120 — Cheaper Than Any Store-Bought Display
Dedicated smart calendar screens cost $200 to $400. This DIY build — a Raspberry Pi, a cheap AliExpress touchscreen, and KinCals — gets you the same result for under $120. With the satisfaction of building it yourself.
DIY Smart Family Calendar Screen for Under $120 — Cheaper Than Any Store-Bought Display
Dedicated smart calendar screens cost $200 to $400. This DIY build — a Raspberry Pi, a cheap AliExpress touchscreen, and KinCals — gets you the same result for under $120. With the satisfaction of building it yourself.
I've wanted a dedicated family calendar screen in my kitchen for years. One screen on the wall — or propped on the counter — that shows everyone's schedules at a glance, without anyone having to pull out a phone or ask "wait, when is that?" The problem is the price. A decent 15-inch smart display purpose-built for the kitchen runs $150 to $250, and frankly most of them are locked into their own ecosystems with apps you didn't ask for.
So I did what any self-respecting tinkerer does: I built one. Total cost came in at around $110–$120, it runs KinCals (Kinmory's family dashboard), and it looks sharp on my kitchen counter. Here's the full breakdown — parts, wiring, and setup — so you can do the same thing in an afternoon.
"A $200 smart display does the same job as a $35 Raspberry Pi and a $60 touchscreen — once you know how to connect them."
The Parts List — and Where to Find Them Cheap
You need four things: a small Linux-capable computer, a touchscreen, the cables to connect them, and a power supply. That's it. Here's exactly what I used and what it cost.
| Part | Where to Buy | Price |
|---|---|---|
|
Raspberry Pi 3 Model B (used, with SD card) 1GB RAM, quad-core, WiFi + Bluetooth built in |
eBay (used) | ~$27–$35 |
|
15.6" Touchscreen Monitor with Stand USB touch + HDMI input. Look for one with a built-in kickstand. |
AliExpress | ~$60–$65 |
|
Micro HDMI to HDMI cable 6ft. The Pi 3's video out is micro HDMI — easy to overlook. |
Amazon / any electronics store | ~$7–$10 |
|
USB-A to USB-A or USB-A to Micro-USB cable For touch input from screen to Pi. |
Amazon / spare drawer | ~$5–$8 |
|
5V / 2.5A Micro-USB power supply Official Raspberry Pi power adapter recommended. Underpowered PSUs cause random crashes. |
Amazon / Micro Center | ~$8–$12 |
|
MicroSD card (16GB+) Class 10 or better. Often included with used Pi purchases. |
Amazon / eBay | ~$6–$10 |
| Total estimated cost | ~$113–$130 | |
* Prices vary. Buying a used Pi 3 on eBay around $27–30 keeps the total under $115 comfortably. A new Raspberry Pi 5 from Micro Center runs $39.99 and will give you snappier performance if you prefer buying new.
When searching AliExpress for a touchscreen, search "15.6 inch portable touchscreen monitor" and filter by "Orders" to find popular ones. Prioritize listings that include a built-in kickstand or case — it makes a huge difference on a counter. Most 15.6" touch monitors in this range list both HDMI and USB connections.
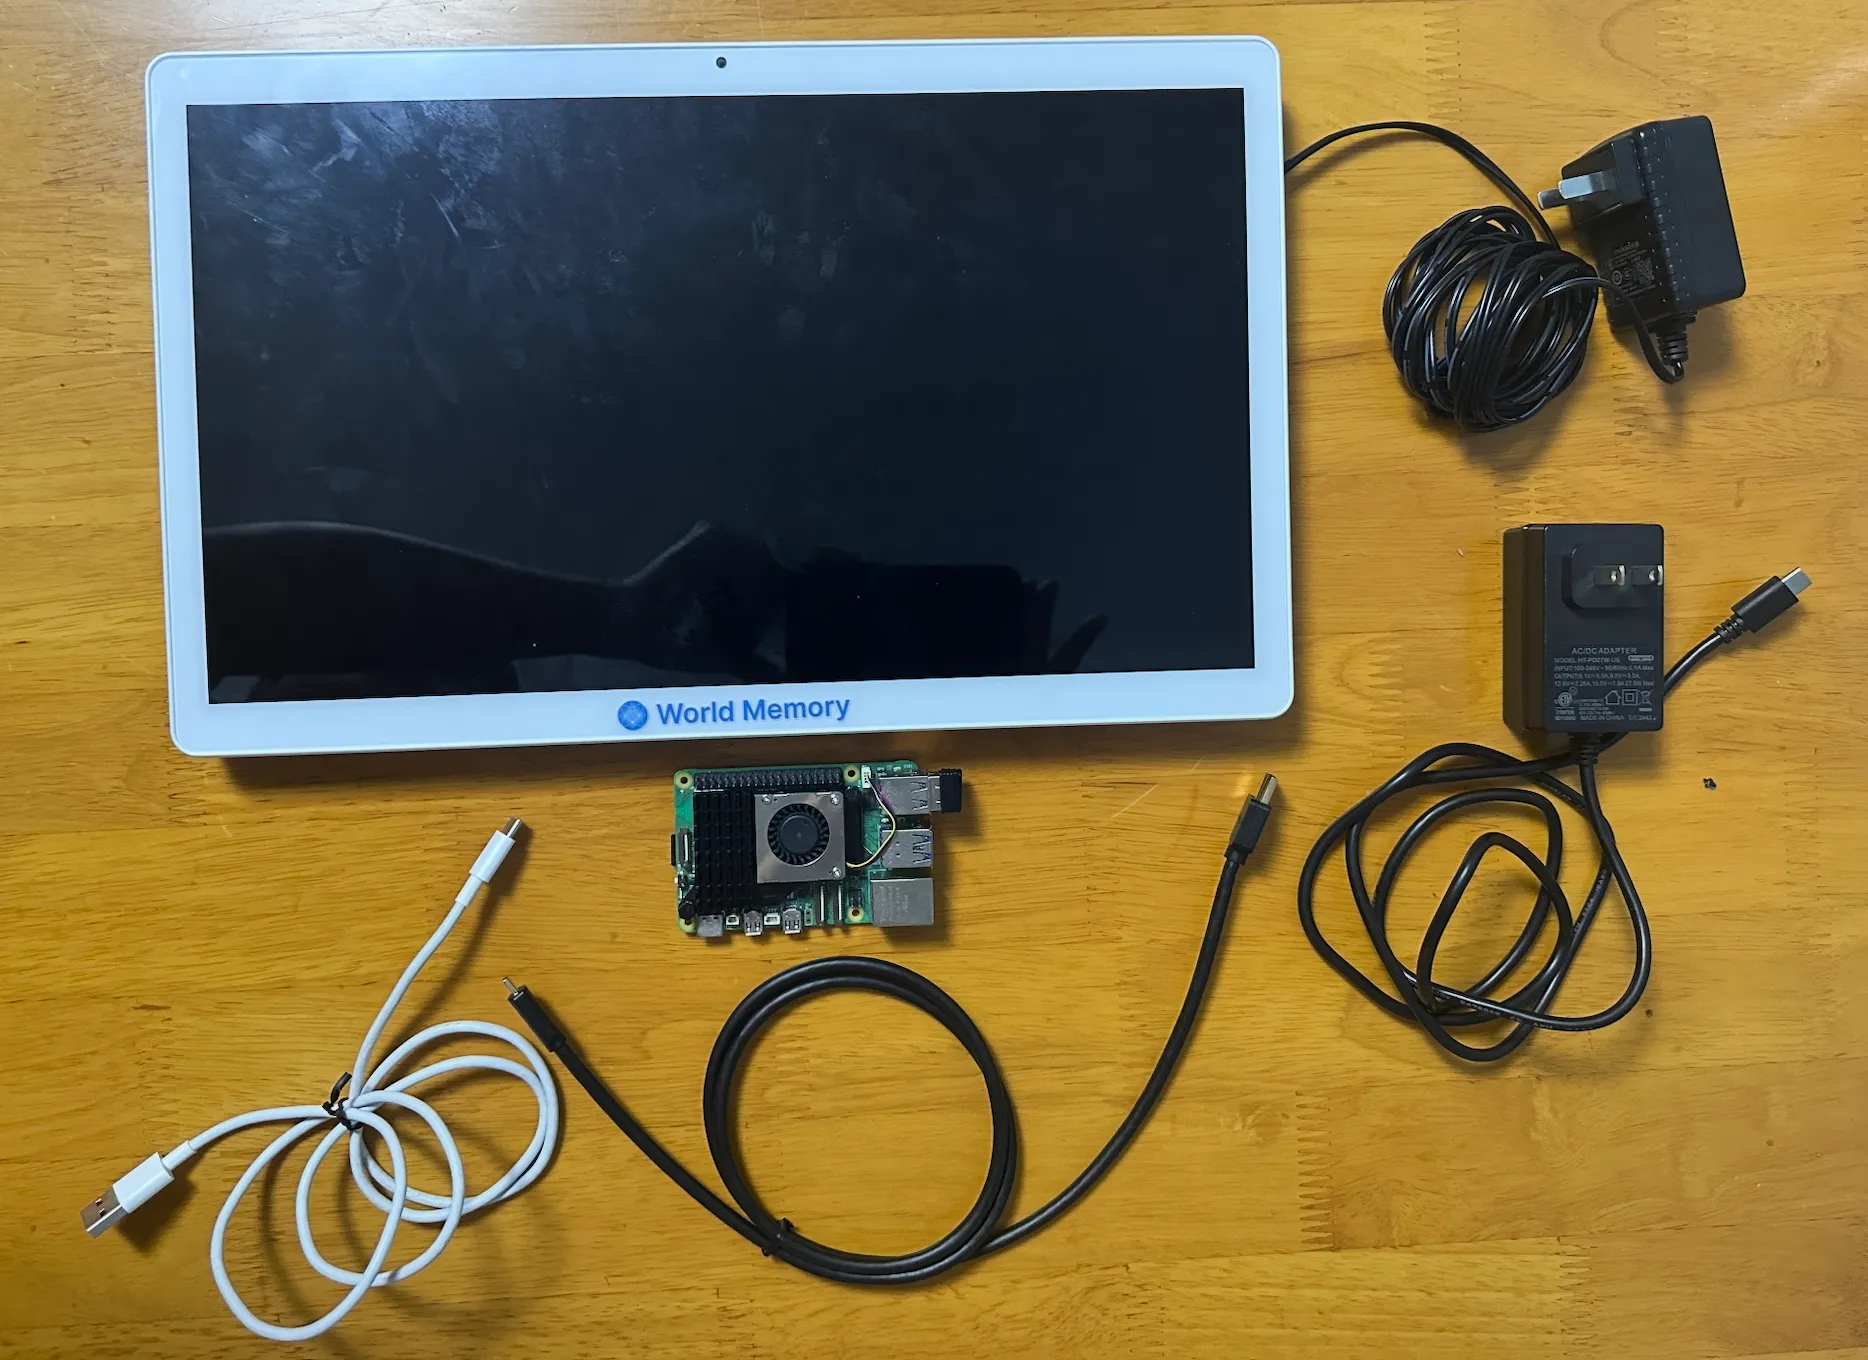
The Raspberry Pi 3 uses micro HDMI for video output — not full-size HDMI and not mini HDMI. Double-check your cable before ordering. The touch function requires a separate USB cable going from the screen's USB touch port to one of the Pi's USB-A ports.
Why a Raspberry Pi? Can't I Use Anything Else?
Short answer: yes, absolutely. Any small computer that runs Linux or Android will work with KinCals. The Raspberry Pi is just the most popular choice because it's cheap, widely available, has a huge community behind it, and runs Linux out of the box.
Other solid options to consider:
Raspberry Pi 5 (new, $39.99 at Micro Center) — noticeably faster than the Pi 3, better for smooth scrolling and animations. Worth the extra few dollars if you're buying new.
Used Raspberry Pi 4 (eBay, ~$40–$50) — a great middle ground. More RAM options (2GB, 4GB) and USB 3.0 ports.
Old Android tablet — if you already have one collecting dust, KinCals has an Android app. You might spend $0 on the compute side.
For this guide, I'm using the Pi 3 because it's the cheapest entry point and handles KinCals without any issues.
On eBay, search "Raspberry Pi 3 Model B with SD card" and filter by Used. Lots sold with a pre-loaded SD card save you a step. Look for sellers with 98%+ feedback and 50+ sales. Prices around $27–$35 are the sweet spot. Avoid anything listed "for parts / not working."
Putting It Together — Hardware in 10 Minutes
Once your parts arrive, the hardware assembly is genuinely simple. No soldering, no tools required. Here's the sequence:
Plug the micro HDMI end into the Pi's HDMI port (labeled HDMI0 on Pi 4/5, the only HDMI port on Pi 3). Plug the other end into the touchscreen's HDMI input port.
Run the USB cable from the touchscreen's "Touch" or "USB" port to any USB-A port on the Raspberry Pi. This is what makes the touch input work — without it, the screen is display-only.
If it didn't come pre-loaded, you'll flash an OS onto it in the next section. The slot is on the underside of the Pi board.
Connect the power supply to the Pi's micro-USB power port (not the same as the HDMI port). Power up the screen separately via its own included adapter or USB-C power cable, depending on the model you bought.
Install the OS — 5 Minutes with Raspberry Pi Imager
If your Pi came with an SD card already loaded with Raspberry Pi OS, you can skip straight to the next section. If not, here's how to flash one.
Go to raspberrypi.com/software and grab the free imager tool. Available for Windows, Mac, and Linux.
In the Imager app: choose your Pi model, select "Raspberry Pi OS (64-bit)", choose your SD card, and hit Write. The whole process takes 5–10 minutes.
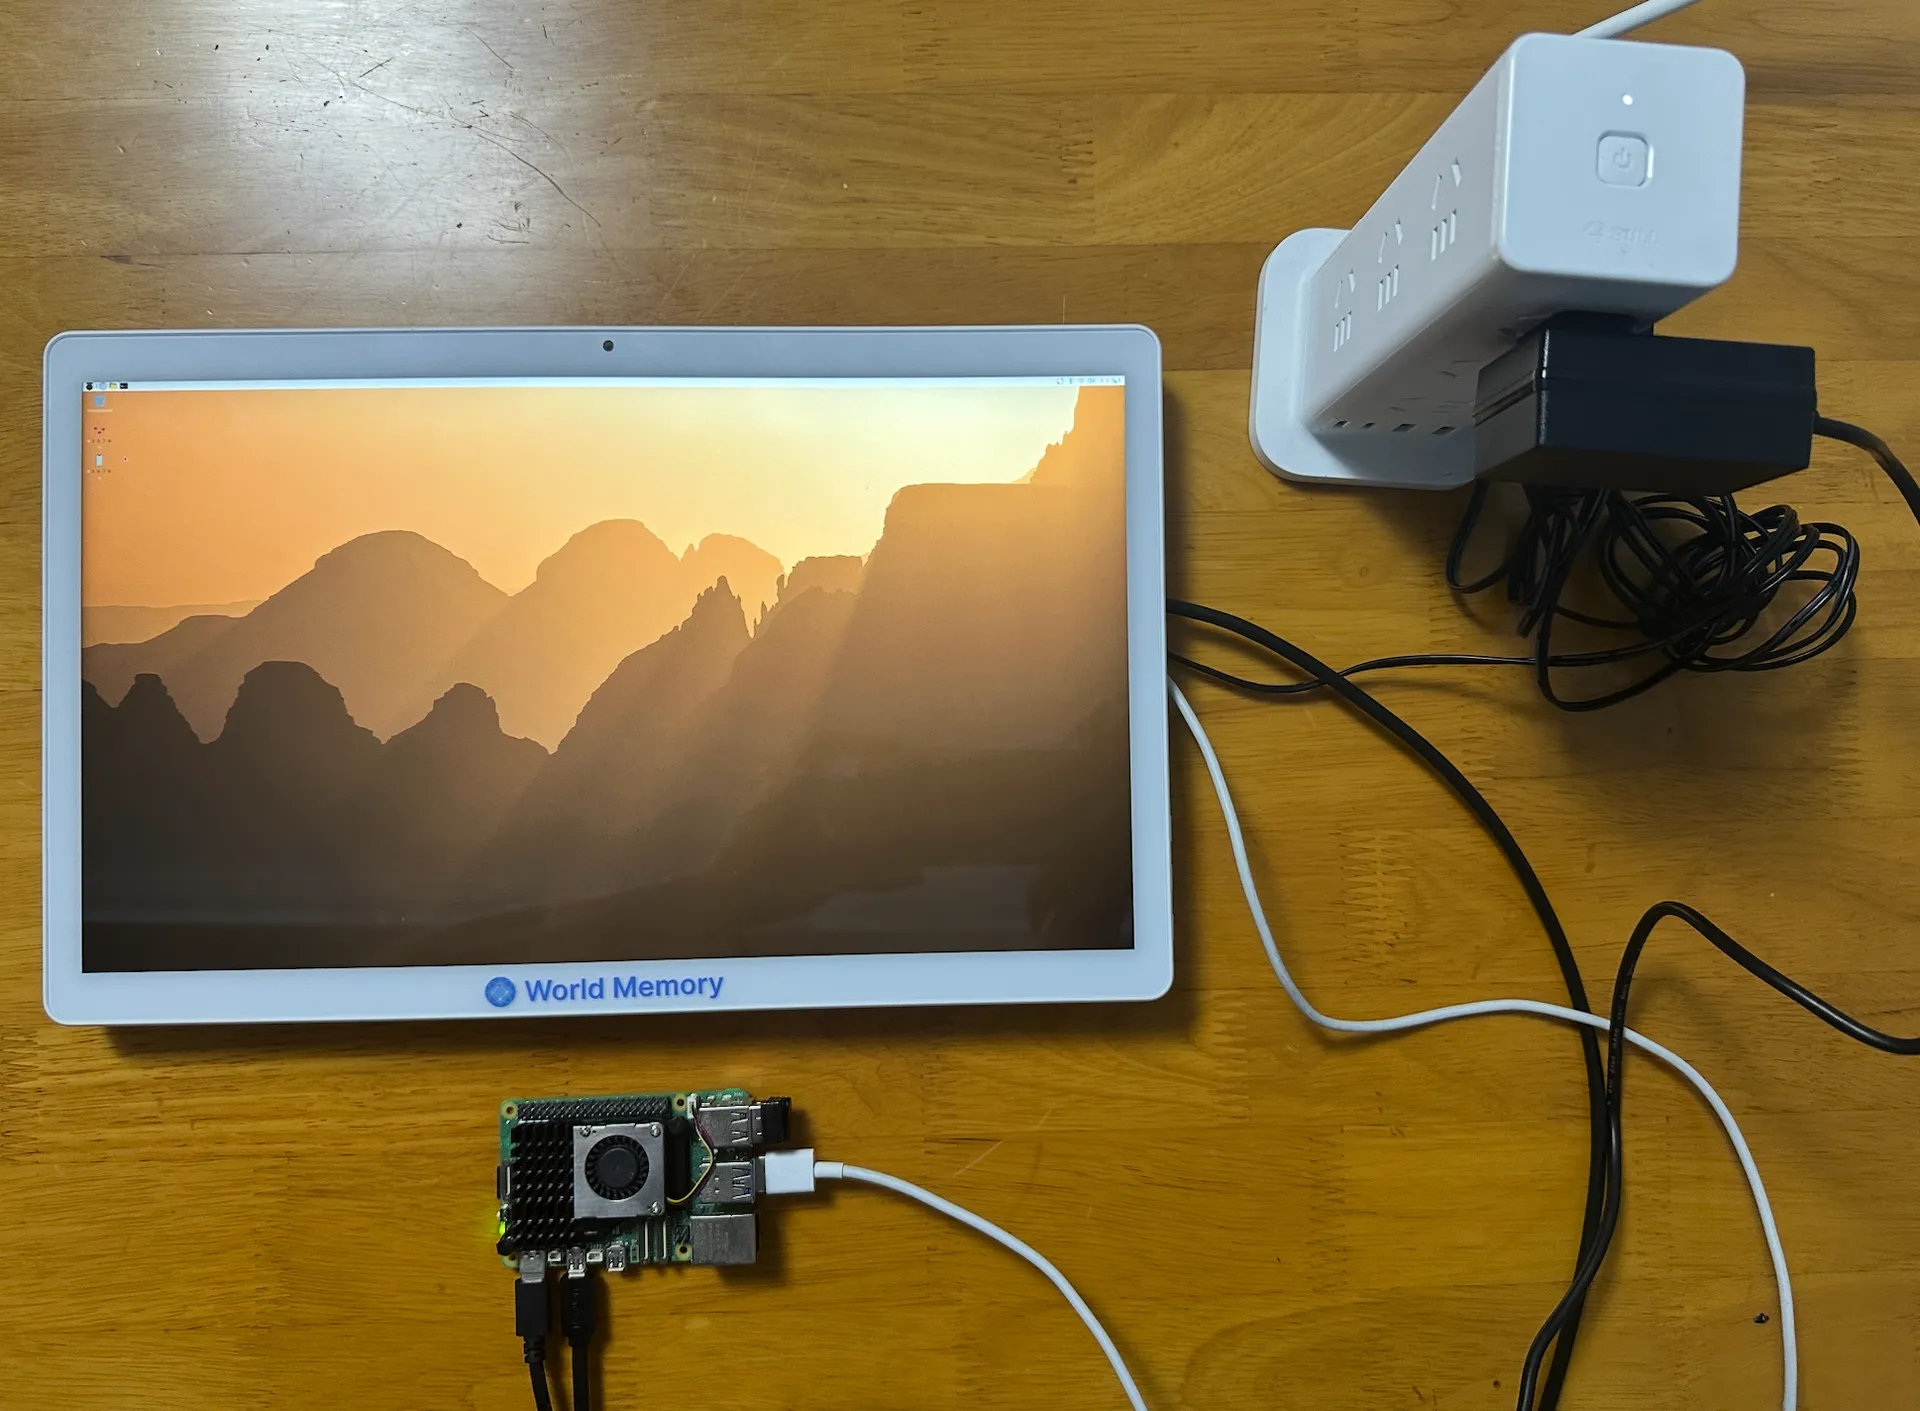
Insert the card into the Pi, power it on, and follow the first-boot setup wizard. Connect to your home WiFi — you'll need it to download KinCals.
KinCals runs on Raspberry Pi OS Bullseye/Bookworm, Ubuntu 20.04/22.04/24.04 LTS, Debian 11/12/13, Linux Mint, and Armbian. Any Debian/Ubuntu-based distro with apt support should work fine.
Install KinCals — Two Commands, Then It Runs Itself
This is the part that surprised me most. The KinCals installer handles everything automatically — dependencies, full-screen kiosk mode, screen-saver suppression, and boot autostart. You don't have to configure any of it manually.
First, figure out which package you need. Open a terminal on the Pi and run:
uname -m
# If output is "aarch64"  → you need the arm64 package  (Pi 3/4/5 running 64-bit OS)
# If output is "armv7l"   → you need the armhf package  (Pi 2/3 running 32-bit OS)
# If output is "x86_64"   → you need the amd64 package  (standard PC)
Then download and install the right package. Here's the command for a Raspberry Pi 4 or 5 running 64-bit OS (the most common setup):
# arm64 — Raspberry Pi 3/4/5 running 64-bit OS
wget https://www.kinmory.ai/downloads/kincals_v1.0.5-17_arm64.deb
sudo apt install ./kincals_v1.0.5-17_arm64.deb
# armhf — Raspberry Pi 2/3 running 32-bit OS
wget https://www.kinmory.ai/downloads/kincals_v1.0.5-17_armhf.deb
sudo apt install ./kincals_v1.0.5-17_armhf.deb

# amd64 — standard PC / Intel NUC / x86 mini PC
wget https://www.kinmory.ai/downloads/kincals_v1.0.5-17_amd64.deb
sudo apt install ./kincals_v1.0.5-17_amd64.deb
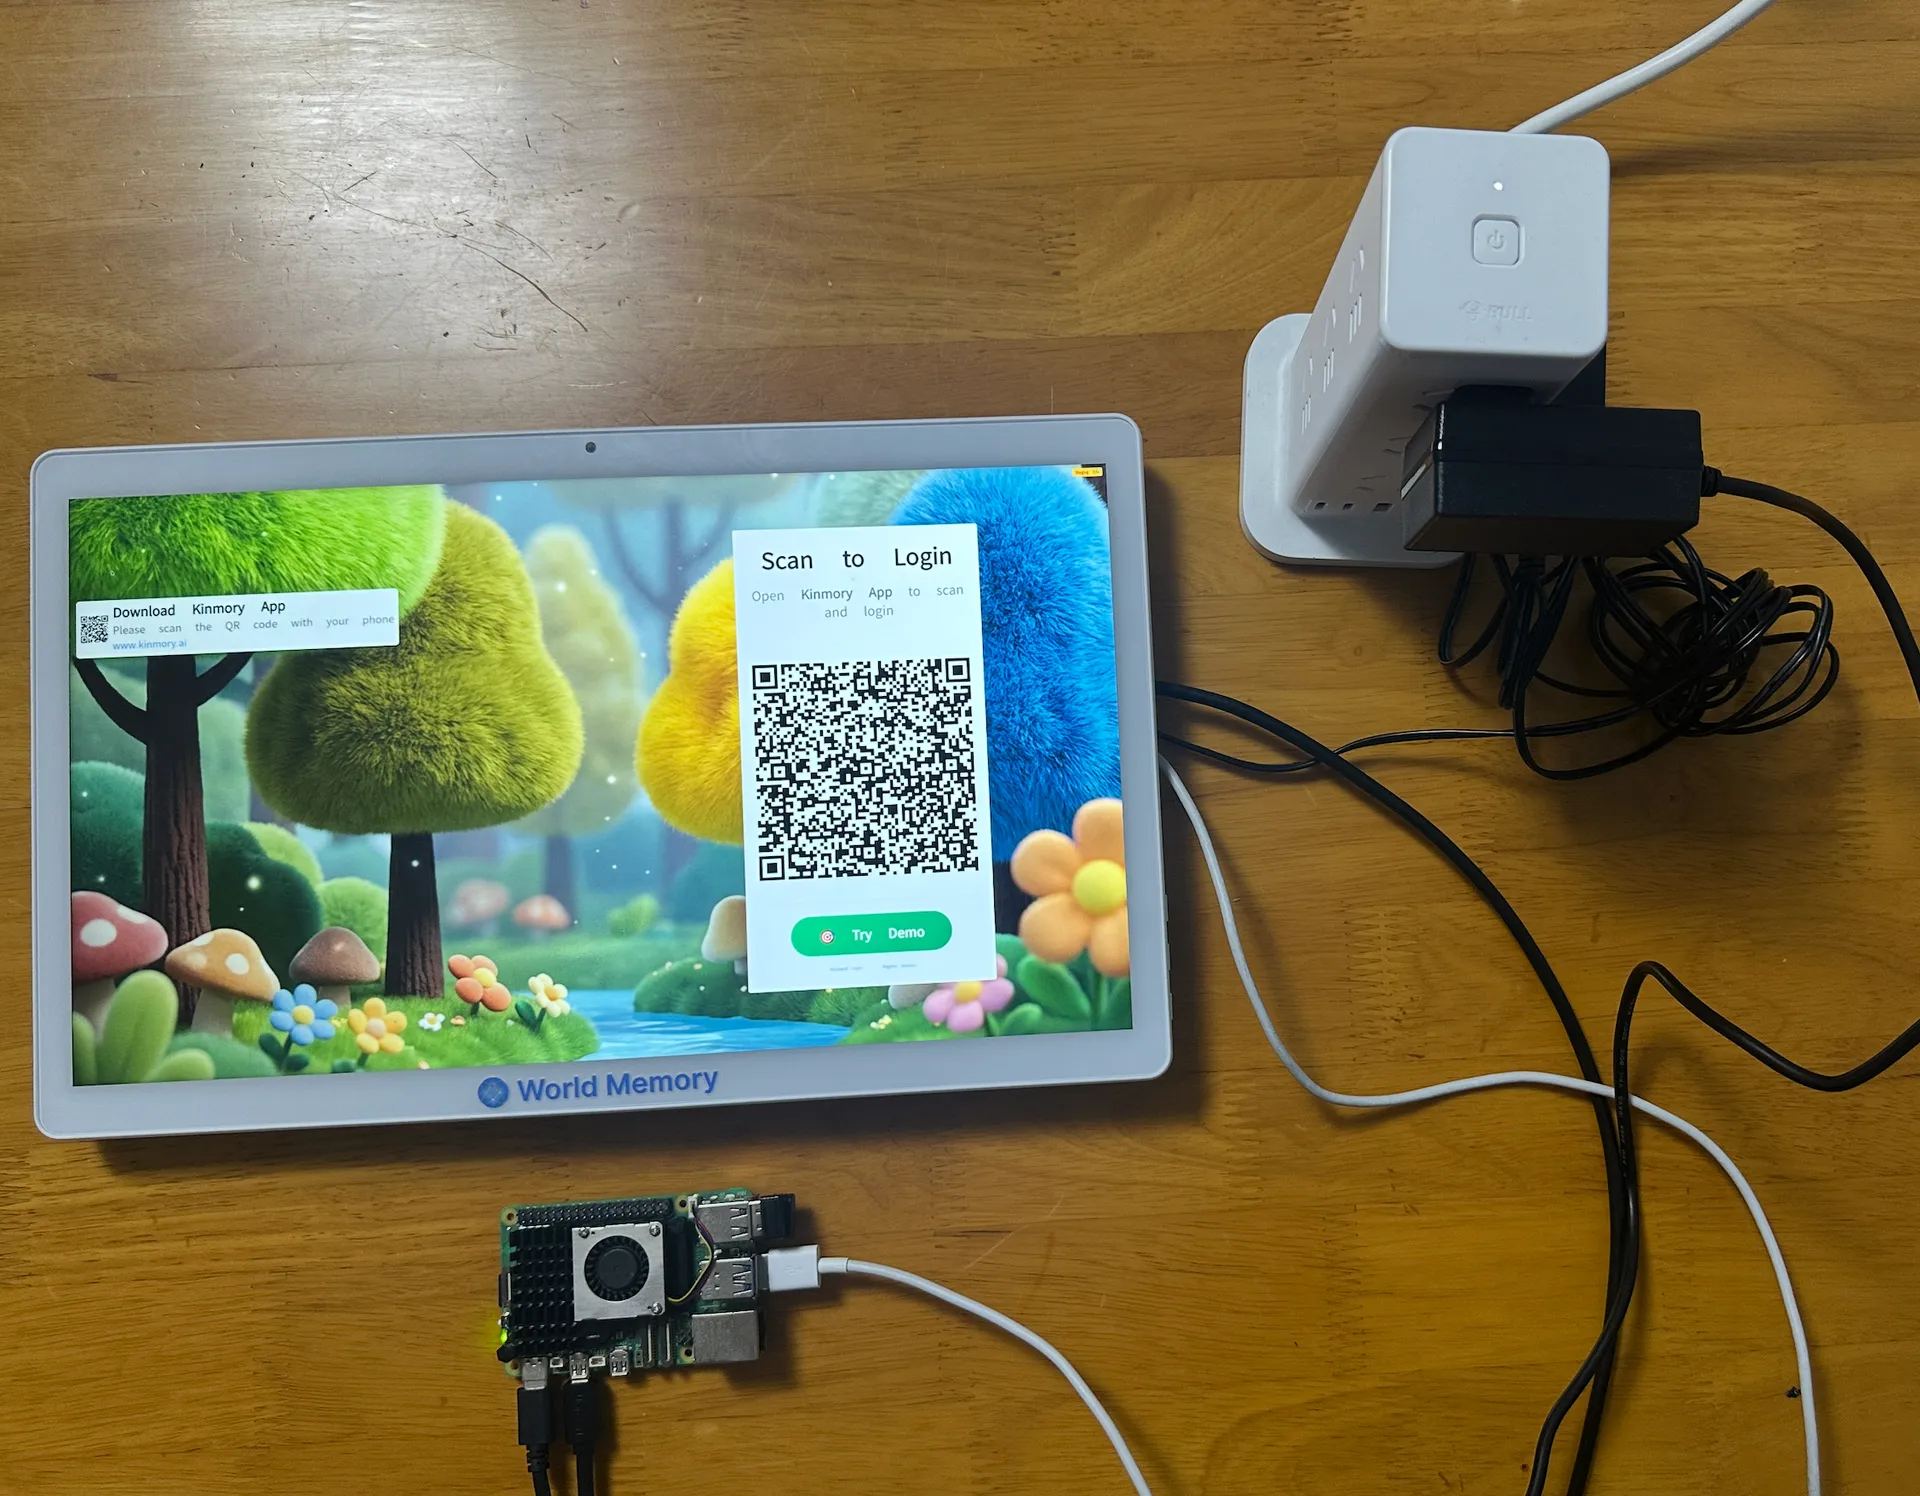
Once the install finishes, reboot the Pi. KinCals will launch automatically in full-screen kiosk mode — no extra configuration needed. The installer takes care of:
Including font packages for proper text rendering — emoji and special characters display correctly out of the box.
Launches borderless and full-screen — exactly what you want for a dedicated display. No taskbar, no distractions.
KinCals starts automatically every time the Pi powers on. Plug it in and walk away — it'll be ready in about 30 seconds.
The installer disables sleep and blank-screen timers so your calendar stays visible all day without any tapping to wake it.
The Raspberry Pi 3B has 1GB of RAM, which is the minimum supported. It runs KinCals, but expect slightly slower load times compared to a Pi 4 or Pi 5. If you plan to run anything else on the device simultaneously, upgrade to a Pi 4 (2GB+). The Pi 3 is perfectly fine for a dedicated calendar display.
You can launch KinCals manually before rebooting to verify everything works: run kinmory-kiosk in a terminal. To exit kiosk mode, go into Settings inside the app and enter the exit password (default: admin123). You can change this to anything you like.
What You Actually Get When KinCals Runs
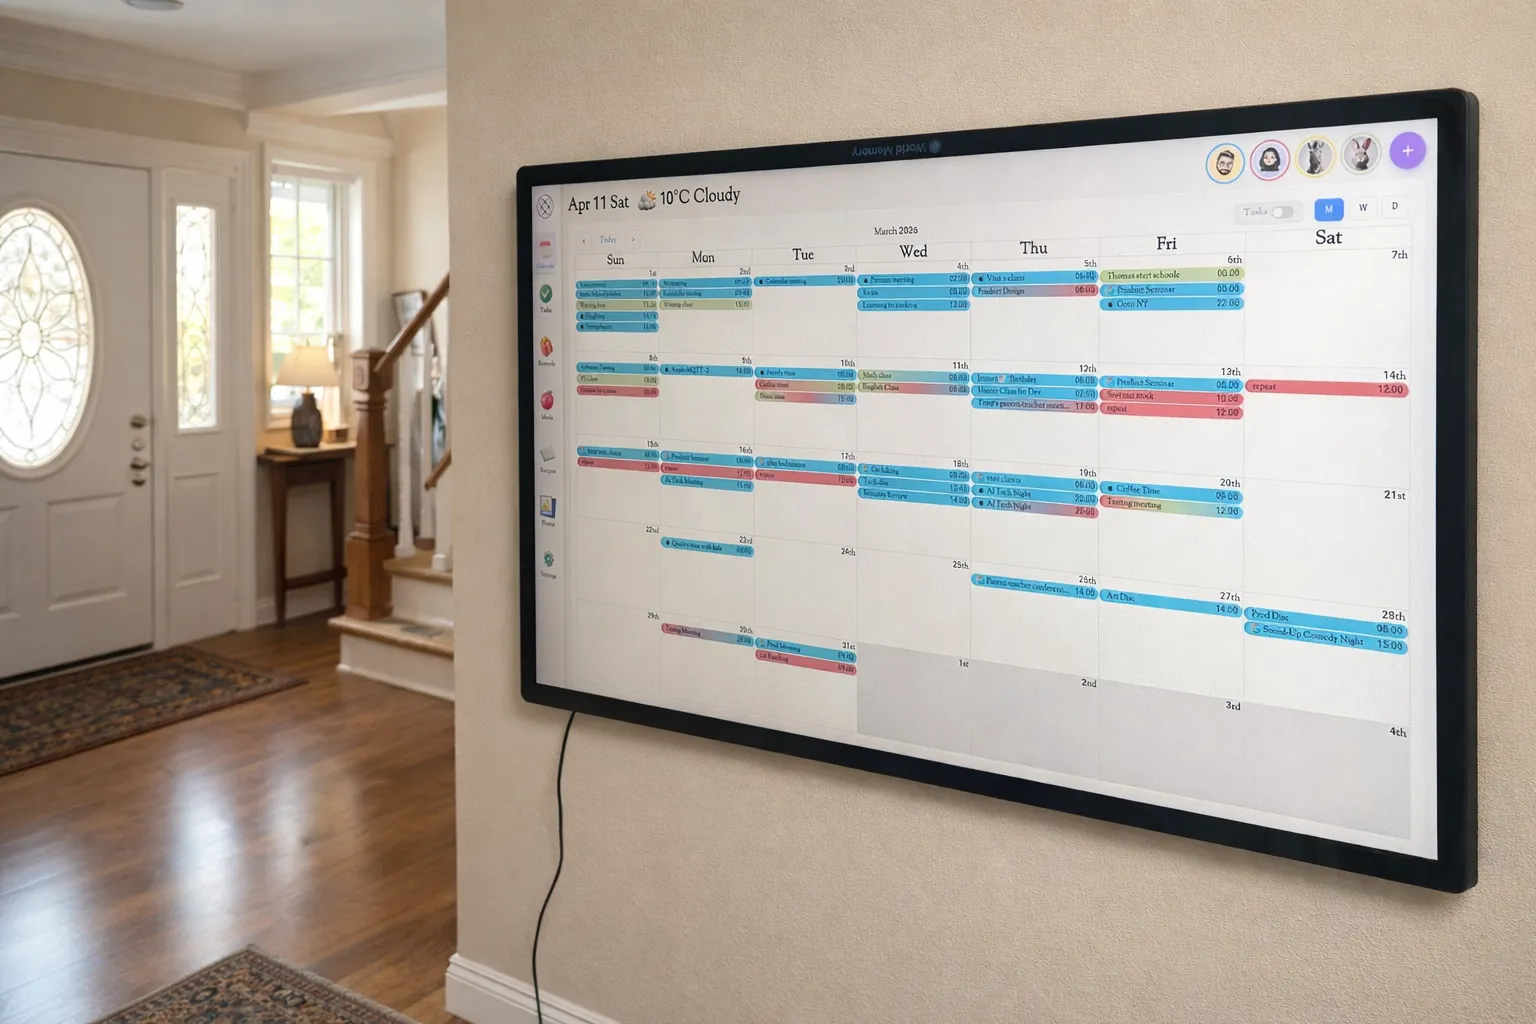
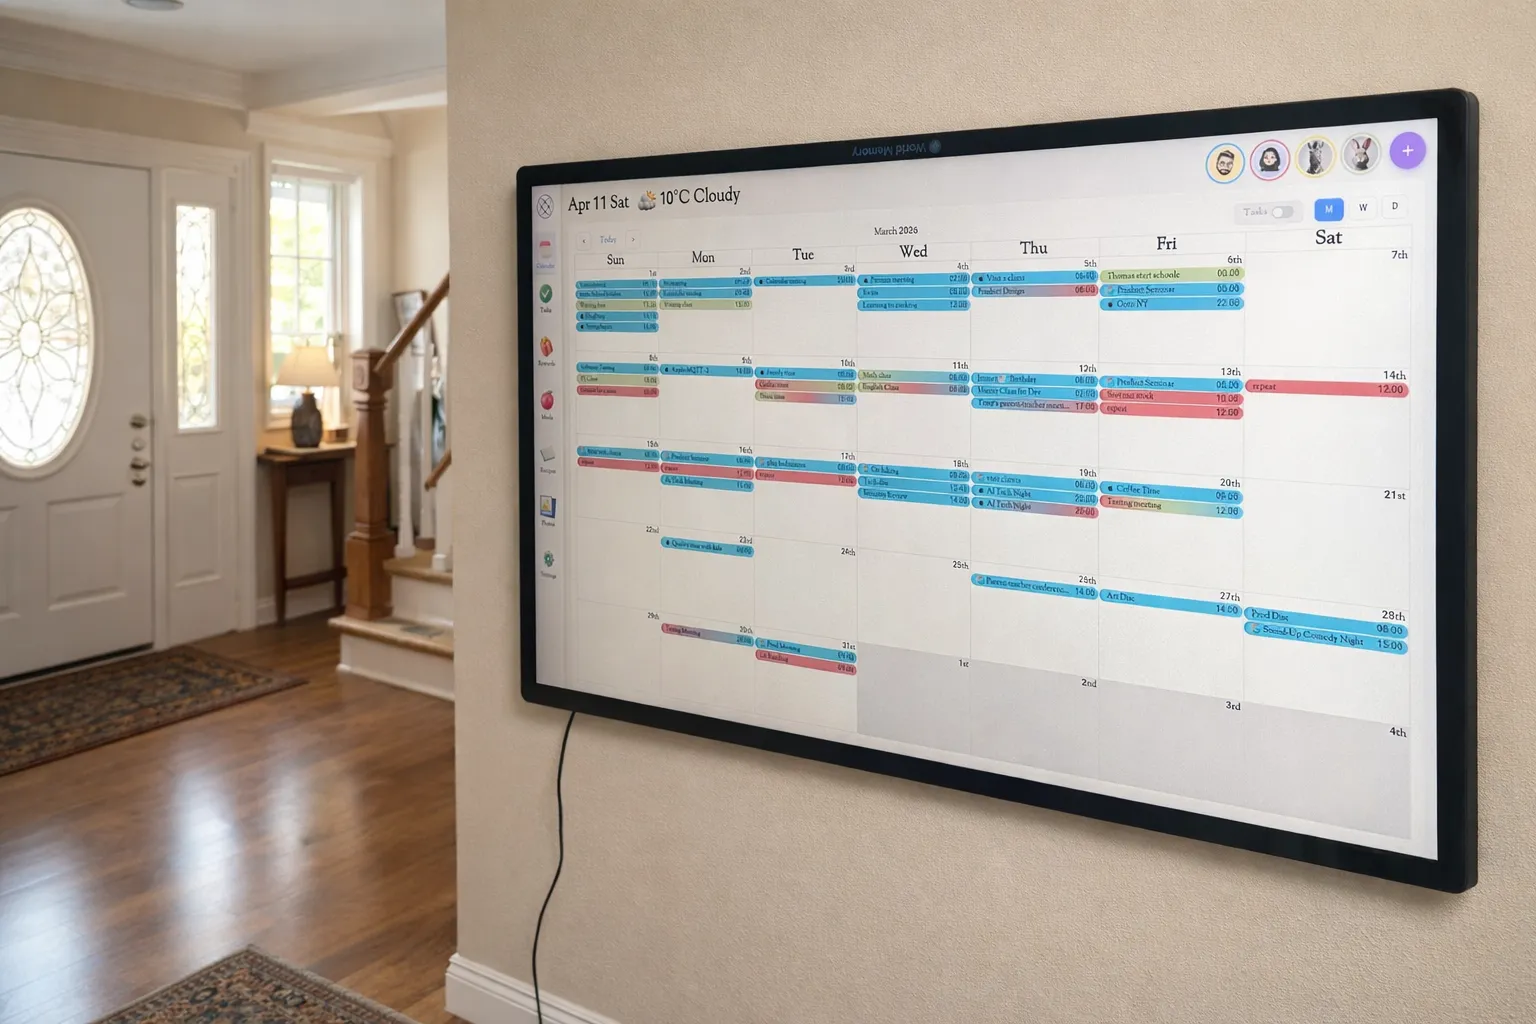
Once it's all running, this isn't just a digital whiteboard. KinCals is a live family dashboard synced to everyone's Kinmory accounts. Everything that gets added to Kinmory — from the app on anyone's phone — shows up on the screen in real time.
On any given morning, the screen shows: each family member's schedule for the day in their own color, any tasks due today, the assigned chore list for the kids (with a tap-to-complete button and reward points), tonight's dinner recipe, and the grocery list ready for Instacart. All of it updated automatically — no one has to manually update the screen.
The touchscreen means kids can interact directly with it — marking chores done, checking off tasks, seeing what's coming up after school. It works equally well propped on a kitchen counter, mounted on a wall, or sitting on a breakfast bar. Because it's running on Linux on hardware you own, there's no subscription for the display itself, no ads, and no proprietary lock-in.
If Something Goes Wrong — Quick Fixes
The installer handles most things automatically, but here are the three issues you're most likely to encounter and exactly how to fix them.
The installer suppresses the screen saver, but some Pi setups need it applied manually. Open a terminal and run:
echo "xset s off && xset -dpms && xset s noblank" >> ~/.xprofile
# Then reboot
Check that your system boots to a graphical desktop (not a terminal prompt):
systemctl get-default
# Should return: graphical.target
# If not, run:
sudo systemctl set-default graphical.target
# Then test the startup script manually:
kinmory-kiosk
The Pi 3's 1GB RAM is the minimum. If KinCals feels slow, adding swap space helps significantly:
sudo dphys-swapfile swapoff
# Open the config file and set CONF_SWAPSIZE=2048
sudo nano /etc/dphys-swapfile
sudo dphys-swapfile setup
sudo dphys-swapfile swapon
Go to Settings inside the app and enter the exit password. The default is admin123 — change it to something personal via the KIOSK_EXIT_PASSWORD environment variable. You can also exit remotely over SSH with pkill -f "ai-calendar-web".
Want a Bigger Screen? 27 Inches for $241
The 15.6-inch touchscreen is the sweet spot for a kitchen counter — compact enough to tuck beside the coffee maker, big enough to read across the room. But if you want something that commands a wall or anchors a home office, 27 inches is very doable with the same setup.
On AliExpress, a 27-inch touchscreen monitor runs around $241. By comparison, a purpose-built 27-inch smart calendar display — if you can even find one — typically sells for $400 or more. Same DIY principle applies: HDMI in, USB for touch, Raspberry Pi behind it, KinCals on screen.
| Screen size | DIY total cost | Commercial equivalent | Savings |
|---|---|---|---|
| 15.6" — counter / island | ~$120 | ~$200 | ~$80 |
| 27" — wall mount / office | ~$310 | $400+ | $100+ |
For most families, 15.6" on a kitchen counter is the right call — it's the screen size you'll actually glance at while making coffee or packing lunches. A 27" makes more sense mounted on a wall in a mudroom, home office, or open dining area where you need it readable from a distance. Either way, the Raspberry Pi and KinCals setup is identical.
$120 DIY vs. $200 Off-the-Shelf — Is It Worth It?
Honestly, yes — but not just for the money. If saving $80 is your only motivation, the off-the-shelf route might be worth it to save the afternoon. But if you want a display that runs exactly the software you want, on hardware you own, with a screen size and stand setup you chose — DIY wins clearly.
| DIY (this guide) | Commercial smart display | |
|---|---|---|
| Cost | ~$113–$130 | $150–$250+ |
| Software | Your choice (KinCals + any Linux app) | Vendor-locked ecosystem |
| Screen size | Your choice (10"–27" available) | Usually fixed at 10"–15" |
| Touch support | Yes | Sometimes, sometimes not |
| Satisfaction | You built it | You bought it |
"The first time the whole family walked up to the screen and started checking things off — that felt different than any gadget I've bought."
Related reading
- Why Traditional Calendars Fail ADHD Brains
Kinmory is like an AI-powered boost for ADHD, delivering always-on assistance throughout daily life. Kinmory’s AI input, visible wall calendar fit ADHD brains naturally.
- A Day in the Life of an American Stay-at-Home Mom
This story follows Sarah, a suburban stay-at-home mom, navigating chaotic daily family routines. With Kinmory’s AI calendar, reclaims precious personal time.
- My AI Chief of Staff: How Kinmory Saved This Working Mom From Chaos
Busy working moms juggle schedules, chores, and deadlines, often leading to burnout. Kinmory is an AI family organizer that automates emails, shared calendars, and tasks.
- A Family Organization System Should Survive a Busy Week
A resilient family organization system favors quick capture, visible next actions and easy recovery over perfect routines and constant maintenance.
Bring your family's plans into one place.
Use Kinmory on the web or phone to share calendars, tasks, meals and the information your household needs next.

Scan to Download
Point your camera here
kinmory.ai/download/kinmory